As a user, you probably already know how ClipTable can quickly turn any data into a SQL Table.
The main-stream option would be:
- Copying a tabular data into your clipboard
- Pressing the magical "Import" button
- Defining a destination server
- Execute!
But there is more to it; Today I'm going to cover some other INSERT options ClipTable supports
For the demo I'm going to use a simple query against AdventureWorksLT2008:
select * from AdventureWorksLT2008.SalesLT.CustomerAddress
I'm taking the result and saving it as a CSV file, and also copying the result into the clipboard.
The first one is the "Generate INSERT Statement" option; which, instead of pumping the data into the table, creates an insert script you can launch anywhere.
Here's how you use it:
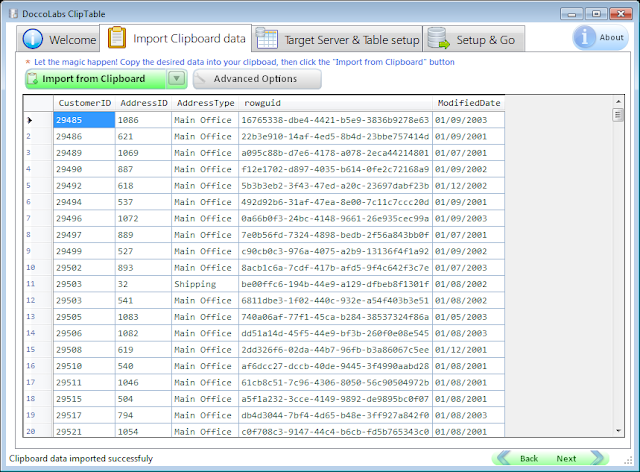
Copying the above query data into the clipboard, I click "Import from Clipboard", and the query data now appears in ClipTable (see screenshot):

Next, I'm going to jump right to the "Setup & Go" tab, but instead of clicking "Execute", I'm going to click the other part of the button, which contains additional insertion options (see screenshot):
Now, select the "Generate INSERT statements only", and the following window appears:
From this point, simply copy the data and execute anywhere you want.
Easy, isn't it?
Now let's move on to the other option: BULK INSERT.
On this option, you let ClipTable perform a field analysis on a CSV file, and then creating a complete BULK INSERT statement to load this file into a table, without having ClipTable to read the entire content into the memory first.
Needless to say, this feature is not 100% bullet-proof due to some known differences with BULK INSERT behavior as well as the fact that the default option is to not analyzing to entire file (speed & memory considerations), so field types may need some additional tune-ups.
OK, Let's go back to the "Import Clipboard Data" tab, only this time, we'll select the "Import from File" option (see screenshot):
Now, let's choose the CSV we've prepared earlier.
Before doing so, as a preparation for the bulk insert, there are two options we're going to change:
1. Make sure "Treat NULL strings as DbNull" option is unchecked
2. Uncheck "Data contains Headers" (since the CSV file does not contain headers on the 1st line)
(see screenshot):
Now, let's jump to the "Setup & Go" tab again and choose the "Generate BULK INSERT" option.
The following window appears:
Again, you can now use this data from your Management Studio (or equivalent) in order to load the data into your table.
Ready to give it a shot?
Get the latest version (for free) here: http://www.doccolabs.com/products_cliptable.html
Cheers


No comments:
Post a Comment